|
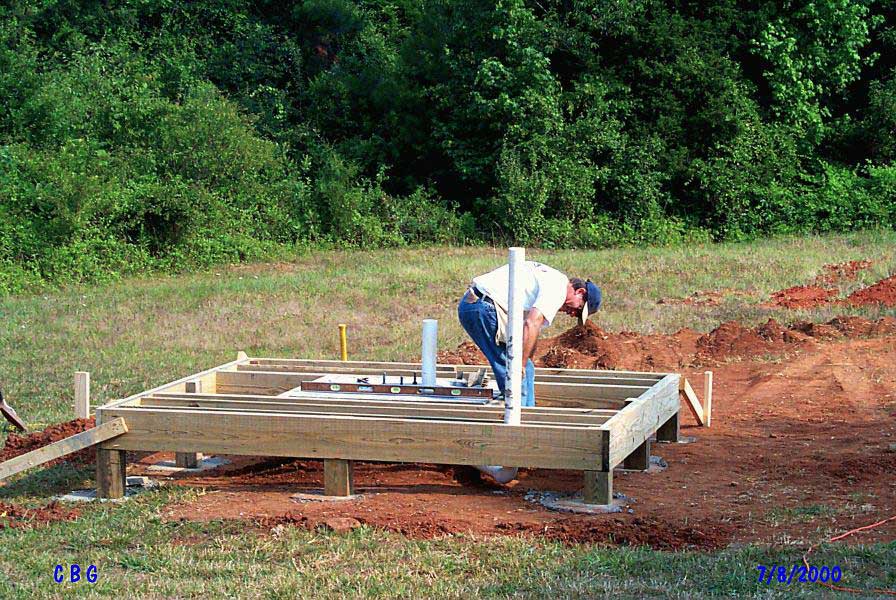
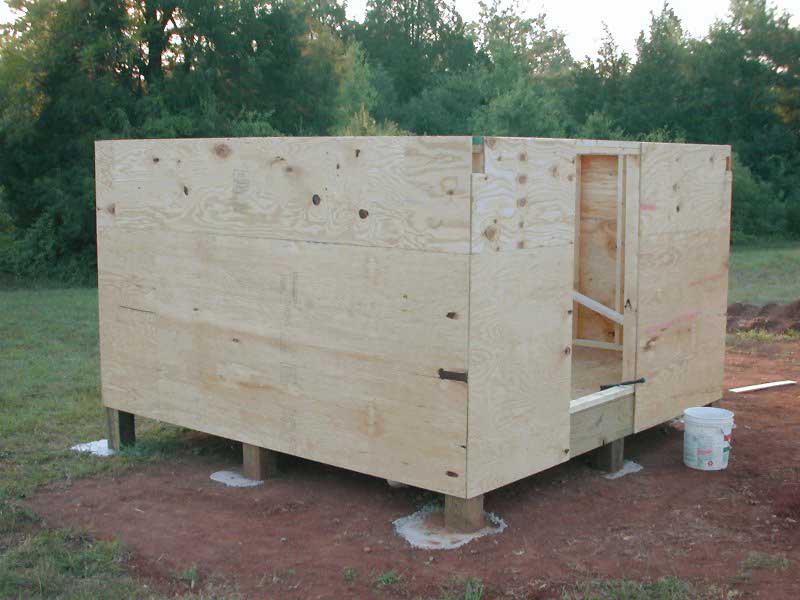
Framing the base. For this area in the South, I chose treated 2 x 10s for the floor joists. (Same thing I used to build my decks). The support feet are 6 x 6 treated posts. (didn't hit my finger but two times)
|
|
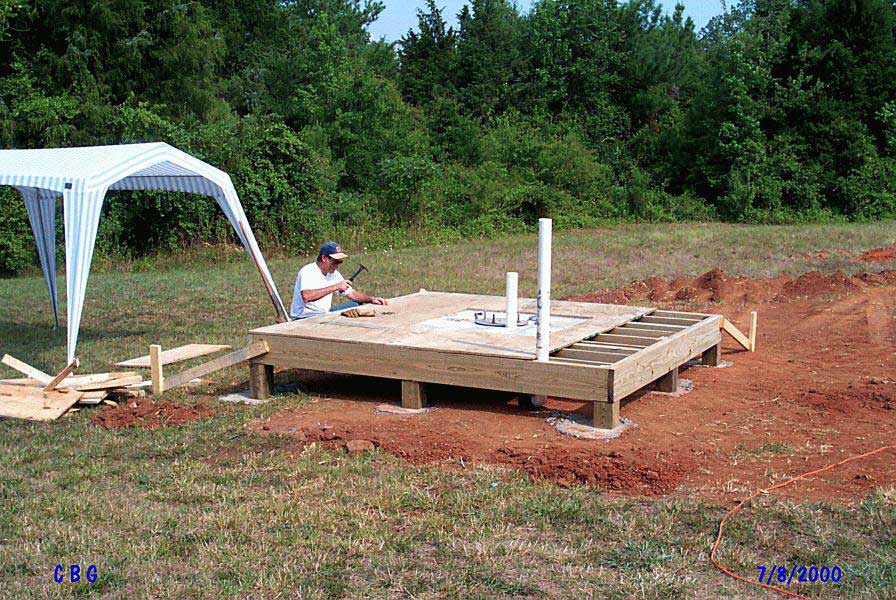
Adding the first layer of flooring which is 3/4" treated plywood. Framing around the concrete pier footing was set back approx. 1/2" to help isolate the pier from vibration when walking around during imaging.
|
|
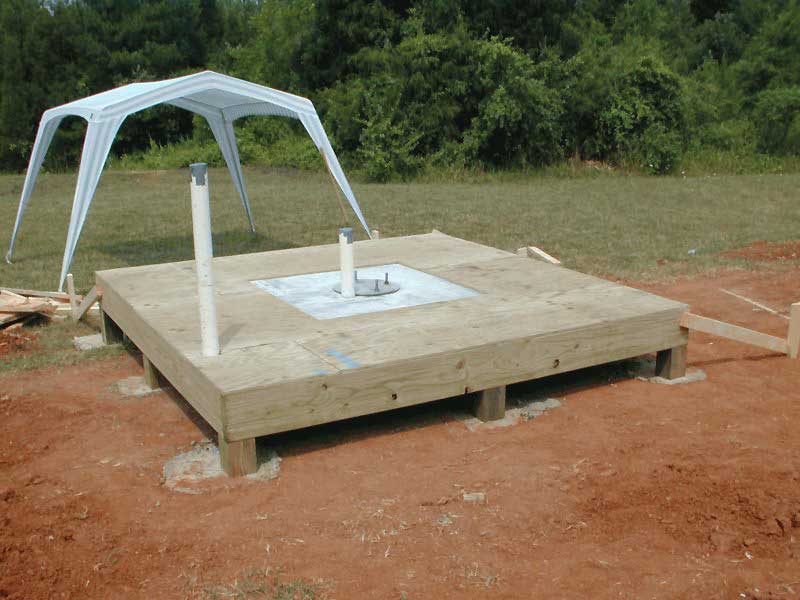
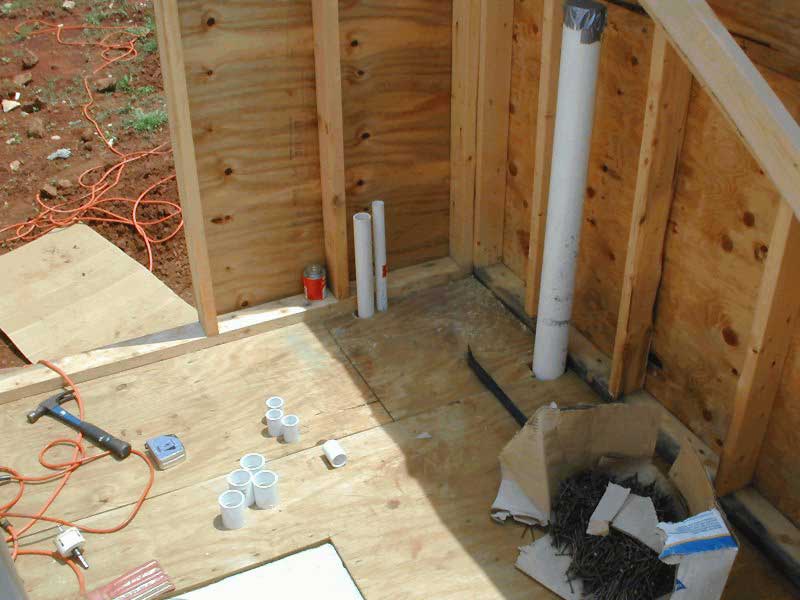
Flooring complete with PVC pipe now in place. I haven't had the scope out in 5 weeks! My wife says test it tonight so she won't have to listen to another "woe is me" story.
|
|
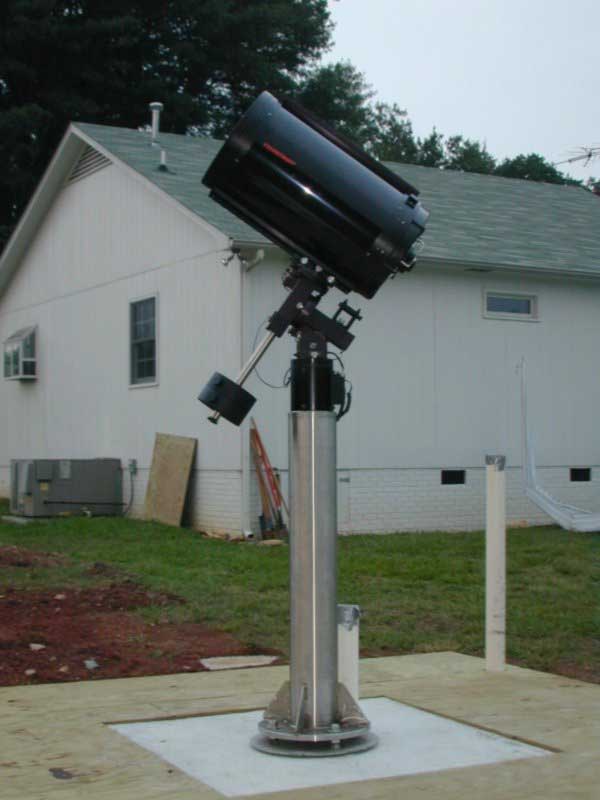
Attached the pier to the foot, and mounted the C14 for the first time. The level was perfect. Took my first ever color image - M27 under a full moon. Killed 37 mosquitos between 10:30 pm and 3:45 am.(don't they ever sleep !)
|
|
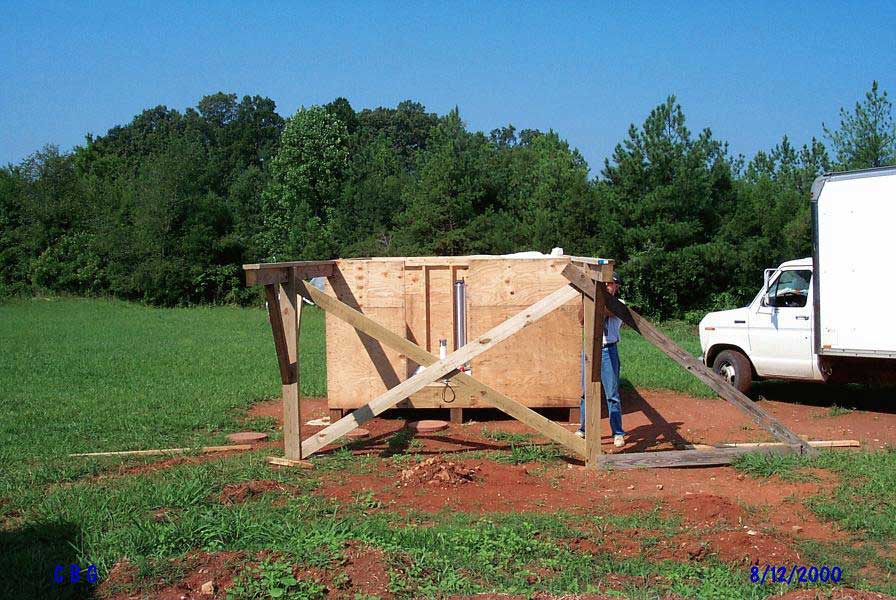
Next came the walls. I made them 5 ft high in order to allow the scope to be parallel to the ground and still be able to see out. This allows for collimation with a laser.(The C14 @ f/11 near focus is about 200 ft)
|
|
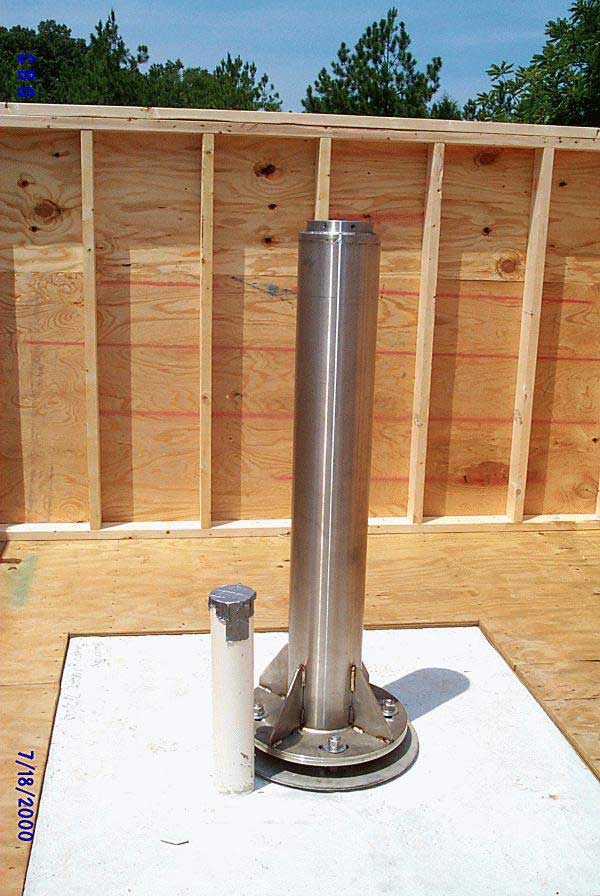
This is a close-up of the mounted pier. Again, it was made by VWT Inc. and is Stainless Steel, 6" in diameter, and 2" thick, 4 bolt base with about 10 degrees of movement. The pre-alignment I did when setting its foot paid off as the bolts are in the middle of the adjustment range.
|

|
Next came the power and communication conduits. I ran two PVC pipes, a 1", and a 2". The 1" carries 2-20 amp circuits to the observatory. The 2" carries 5 cat-5 cables, 1 RG-6 coax cable, and 1 Belden parallel cable.
|
|
They come out here. This gives me telephone, video, 3 serial port connections, 1 focuser extension, a parallel extension, 1 100mb ethernet connection, and 2 spare 4-wire connections for future use. One is reserved for the weather station yet to be installed.
|
|
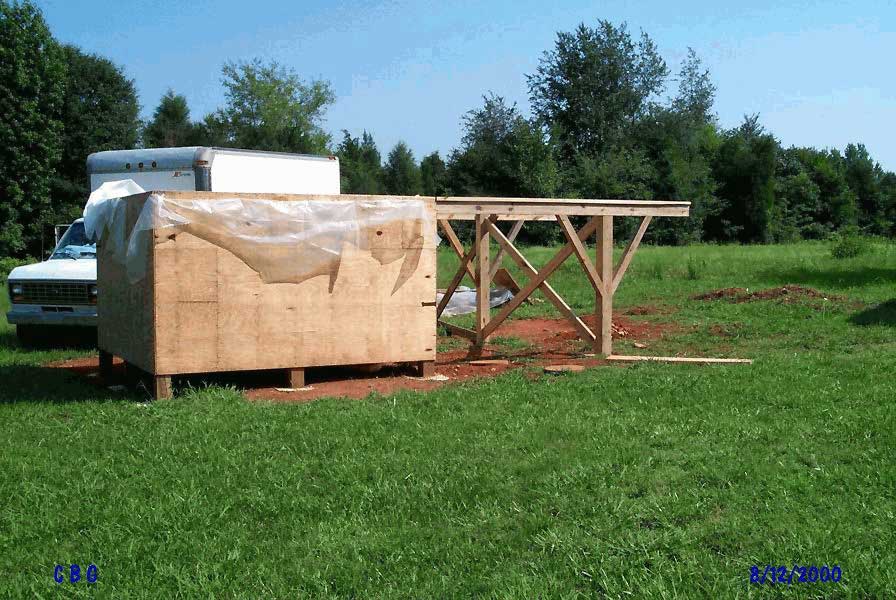
Next we built the supports for the roll-off-roof. 6 x 6 treated posts for support and 6 x 4 treated posts for the rails with 2 x 6 treated boards on top.
|
|
Now folks are starting to ask "What kind of tool shed is this anyway?"
|
|
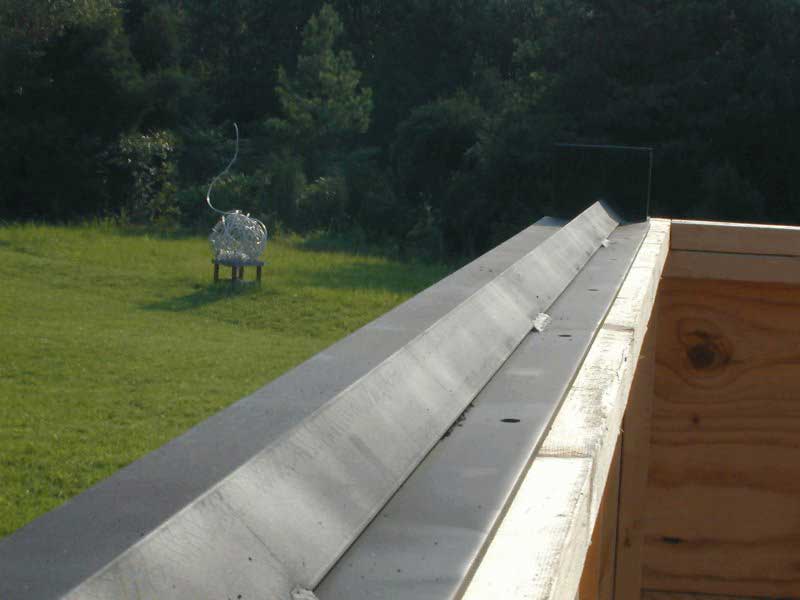
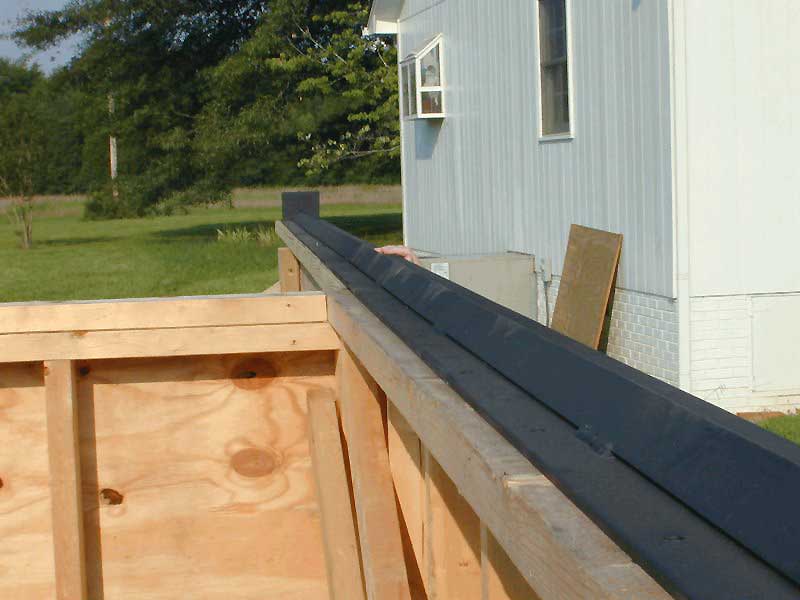
I'm back to my buddy Vernon at VWT Inc for the roof rails. Thanks to Chris Vedeler for his rail designs. Vernon made the rails 20 ft long with stops on both ends. Materials are 1/2" angle iron and 1/2" flat plate welded and holes drilled every foot in the top and sides. (This adds tremendous support and strength to the walls)
|
|
Looking down the rail. I can't remember whose hand that is.
|
